
Yamaha
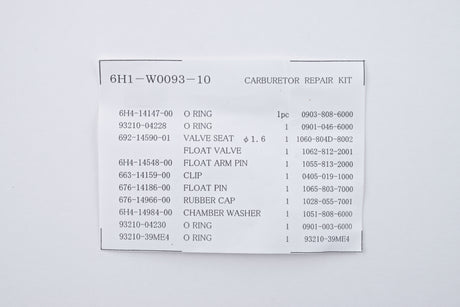
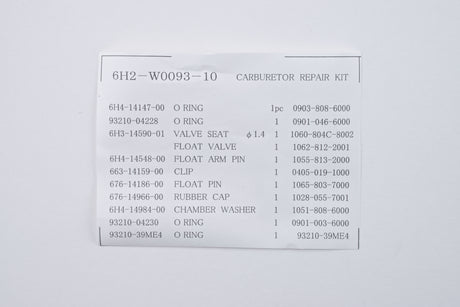
Yamaha 6H1-W0093-10-00 - 90T B90 C90 P75 Carburetor Repair Kit
$47.81 USD$53.40 USDUnit price /Unavailable
Yamaha
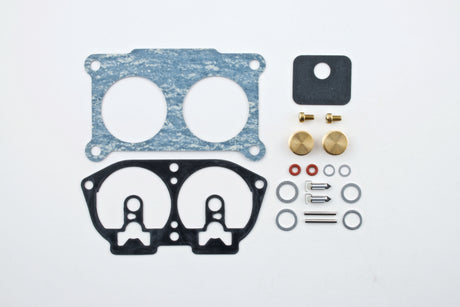
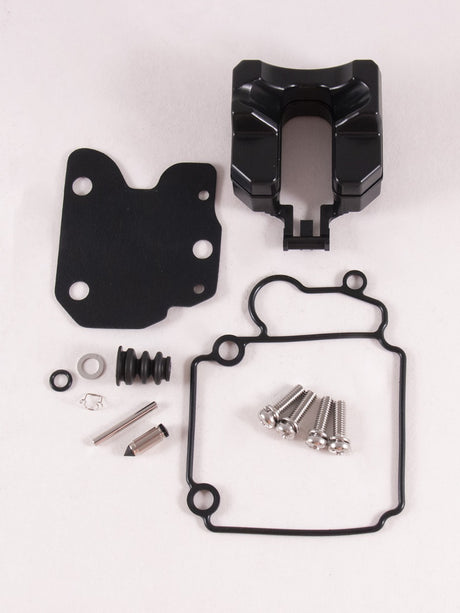
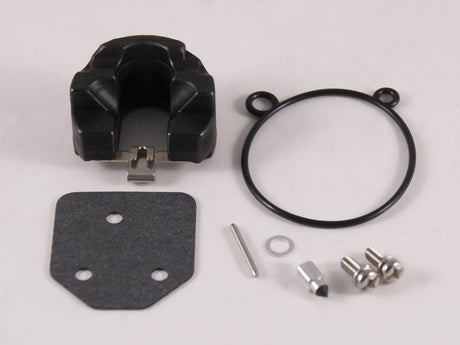
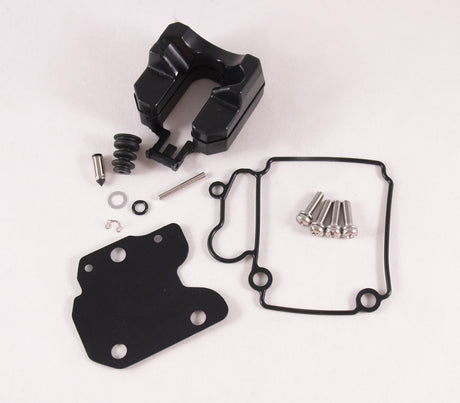
Yamaha 6DR-W0093-00-00 - Carburetor repair kit
$125.53 USD$140.05 USDUnit price /Unavailable
Yamaha
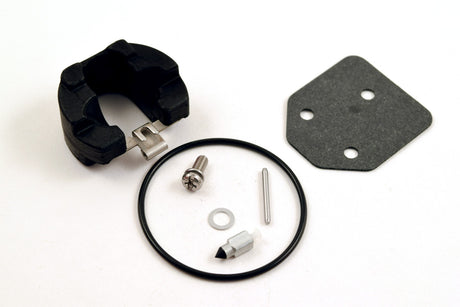
Yamaha 65W-W0093-00-00 - F25 T25 Carb Repair Kit
$72.23 USD$80.55 USDUnit price /Unavailable-

Yamaha
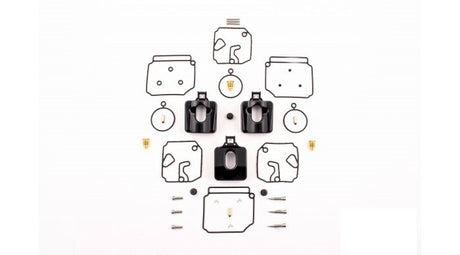
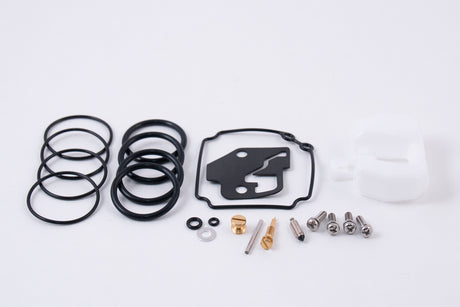
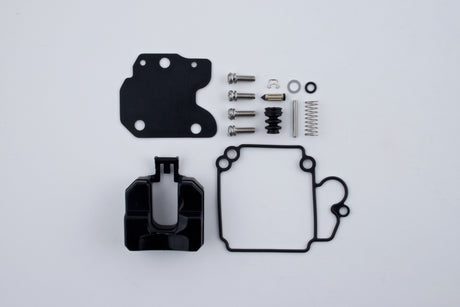
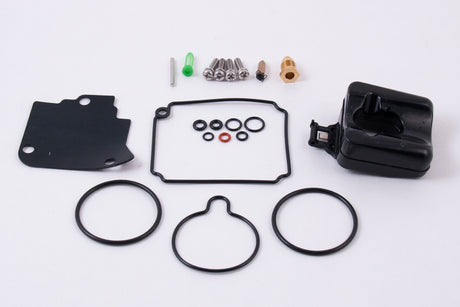
Yamaha 66M-W0093-01-00 - Carburetor repair kit
$59.66 USD$66.60 USDUnit price /Unavailable
-
-
Yamaha
Yamaha 65W-W0093-02-00 - Carburetor Repair Kit
$72.23 USD$80.55 USDUnit price /Unavailable -
-
-
-

Yamaha
Yamaha 6AH-W0093-01-00 - Carburetor repair kit
$89.70 USD$100.15 USDUnit price /Unavailable-
Yamaha
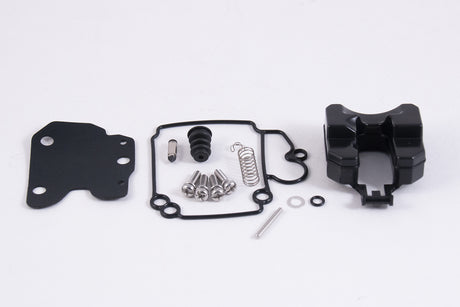
Yamaha 69W-W0093-10-00 - Carburetor repair kit
$166.10 USD$195.45 USDUnit price /Unavailable -
-
-
Yamaha
Yamaha 6BL-W0093-00-00 - F25 T25 Carb Repair Kit
$160.75 USD$175.15 USDUnit price /Unavailable -
-
Yamaha
Yamaha 64D-W0093-01-00 - Carburetor repair kit
$141.78 USD$158.25 USDUnit price /Unavailable -
-
-
-

Yamaha
Yamaha 6AU-W0093-00-00 - Carburetor repair kit
$72.73 USD$81.15 USDUnit price /Unavailable
Yamaha
Yamaha 6AH-W0093-00-00 - Carburetor repair kit
$82.41 USD$91.95 USDUnit price /Unavailable-
Yamaha
Yamaha 68T-W0093-00-00 - Carburetor repair kit
$92.38 USD$103.05 USDUnit price /Unavailable -
Yamaha
Yamaha 67F-W0093-02-00 - Carburetor repair kit
$109.20 USD$121.90 USDUnit price /Unavailable -
Yamaha
Yamaha 63V-W0093-01-00 - Carburetor repair kit
$92.45 USD$103.10 USDUnit price /Unavailable -
-
-
-
-
-
-
-


Yamaha Outboard Trim Tabs
If your boat tends to drift or pull in one direction when cruising, it might be time to look at the trim tab on your outboard motor. These small yet essential components help you maintain control by balancing out torque and steering pressure—especially noticeable at higher speeds. Learning how to properly adjust the trim tab on an outboard motor can lead to smoother handling and less strain on the wheel.
We carry a complete range of Yamaha-certified outboard trim tabs, built to match the specs of your exact Yamaha engine model. Whether you’re replacing a worn tab or making performance tweaks for better fuel economy, each part in our collection is designed to fit seamlessly and perform reliably on the water.
Not sure what you need? If you're noticing your boat veering off-course or feeling extra resistance while steering, there's a good chance a simple trim tab adjustment can make all the difference. And if you’re replacing the part entirely, finding the right match is just as important—too small or mismatched, and it won’t do the job. That’s why we list the specs clearly for each product so you can get it right the first time.
Every trim tab in our collection meets Yamaha’s engineering standards and is made to withstand tough marine conditions, from saltwater exposure to extended high-speed runs. These aren’t generic replacements—they’re made to last and to keep your Yamaha running as it should.
Ready to fine-tune your steering and reduce helm effort? Browse our Yamaha outboard trim tabs today and find the part that helps your boat perform like it was meant to.